Padre LFO Generator: LFO/Randomize Items, Takes & CC (Rapid-Fire Reaper Tutorials Ep60)
- Arya Afshar

- Feb 19, 2021
- 3 min read
Updated: Feb 19, 2021

Hey folks!
In this episode I'm gonna show you, through a few examples, the SWS Padre LFO Generator. It's one of the best SWS features and does certain things beyond the capabilities of REAPER's native Automation Items (which we have covered previously here).
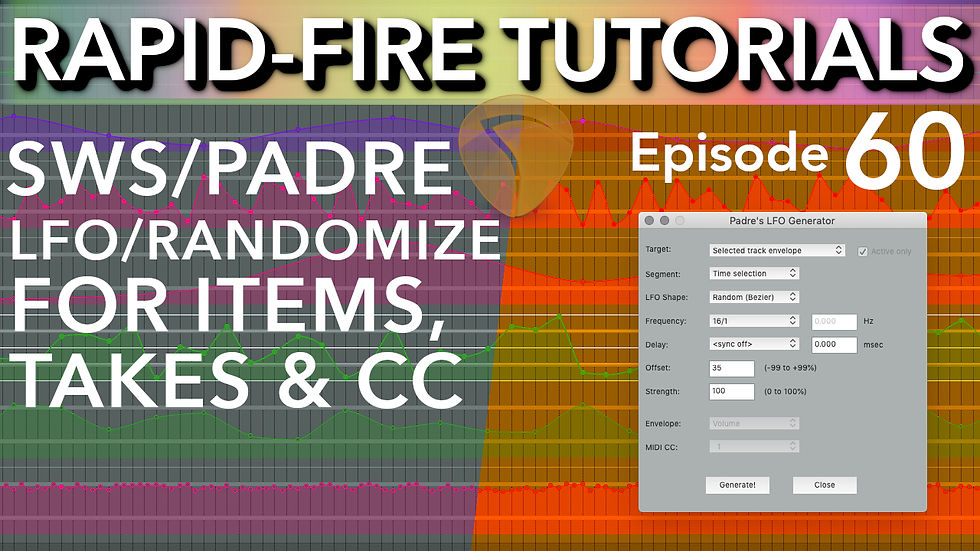
In the video I'll show you some practical examples, but for the more theory-minded, here's a full breakdown of all the Parameters:
Target: Sets the target for the LFO/Randomizer. You can do this with Selected track envelopes, Takes/Item Envelopes, or MIDI items (for CC operations)
Note: With track envelopes, we already have automation items, but it's still useful as Automation item editor doesn't have a random generator, and this window also makes it easier to generate envelopes for multiple parameters more quickly.
Segment: Allows for applying the LFO/Randomizer to a segment of the whole item/track envelope. You can choose loop, time selection or simply selected item(s).
LFO Shape: Sets the LFO shape. Other than all basic waveforms (Sine, Saw Up, Saw Down, Square, Triangle) You can also set it to Random or Random Bezier. The Random generator creates totally vertical automation points which makes the values jump, so it's more appropriate for example, to create a random sine wave melody, but the Bezier creates curved points which sound more smooth, for example to use to randomize Cutoff points on a filter or do random frequency sweeps (like we will show in the video.
Frequency: Sets the Frequency of the LFO in beat values, or with 'Sync off' selected, allows you to set the frequency in Hertz (watch out for really high values)
Note: The values divided by 1 indicate beats not measure, so note that 2/1, for example, doesn't mean 2 measures, but 2 beats, and 4/1 is 4 beats or 1 measure, and so on.
Delay: Sets the offset for the LFO generator. By default, it starts at the midpoint going up first and then down, but with the Delay (which is really a phase parameter as it doesn't actually delay things) you can change the start point of the generated LFO/Randomizer.
Offset: Sets the offset amount for the midpoint. Could be anywhere from -99% (midpoint is close to the lowest value possible for the parameter) to +99% (midpoint is almost the highest value possible for the parameter)
Strength: Sets the amount of the LFO's deviation (whether cyclical or random) from the midpoint. At 0% there will be no deviation (ie no envelope applied) and at %100 the value goes from the midpoint to the highest and lowest values possible for the parameter.
Envelope: This is greyed out unless you have Items/Takes selected in Target. When Items/Takes are selected, this allows you to choose Volume, Pan, Pitch, or Rate for the item and apply the LFO to it. A free and quick way to add a Vibrato, Tremolo, or Autopan effect to your sounds without a plugin!
MIDI CC: This is greyed out unless you have MIDI items selected in Target. Simply choose the CC number from here. The values don't indicate what the CC is, but you can open any MIDI item and use the CC lanes as a cheat sheet!
Note: If selected Track Envelopes is selected in Target, both the above parameters are greyed out. You instead have to click on any visible envelope lane to apply the LFO/Randomizer
Here's the video:
If you like the work I do, you can donate to me here. Every little helps, so even if you send a dollar or two my way, I’ll be eternally grateful to you!
My Music:


Comments